Bell Peppers: How to Grow Care and Harvest for
Guys, I am feeling so glad to talk about my favorite vegetable; as bell peppers are my favorite, I am sure this guide will be very interesting for all of you. One of the most enjoyable experiences of my gardening journey has been growing bell peppers.
These colorful, crunchy, and full of nutrients gems are fun to grow in the garden as well as to eat. They are a powerful source of nutrients like C and A, and because of their versatility in cooking, they are a staple in kitchens all over the world, from grilling stir fries to unique platters of mixed salads.
Bell peppers work well in any garden setup, whether you are using containers on a balcony, raised beds in the backyard, or a large traditional plot. This is what I like most about them. In any growing environment or level of experience, bell peppers offer the ideal balance of quality to quantity.
I’ll talk over all you need to know in this guide so you can grow these delicious vegetables with confidence and great interest because it will never be a boring experience or procedure, so let’s move on.
Choosing the Right Bell Pepper Variety
I often scroll on some social media platforms to get informed about gardening, and I read there some lines about bell peppers from a gardener. He said that I love to grow all varieties of bell peppers because of their colorful look, and whenever I look at my garden, I feel like a bundle of colors is spread all around. Once I read a meme about bell peppers on social media that made me laugh, it was that:
Bell pepper: “I am ready to thrive!”
Gardner: “I am ready for some delicious stir-fry.” Hah
So guys, when it comes to talking about the varieties of bell peppers, the options can seem endless when it comes to choosing the ideal bell pepper varieties for your garden, but it’s necessary for the fun! I’ve tested with everything from classic heirlooms to disease-proof hybrids over the years, and each variety has added a unique flair and charm to my nursery. There are bell peppers that are perfectly suited to your space, climate, and taste buds, whether you’re planting in a large garden or a small balcony.
Peppers in Pots and Containers: Grow, Care & Harvest Guide
Types of Bell Peppers
- California Wonder
- Sweet chocolate bell
- Ozrak Giant
- Early Sunsation Hybrid
- Gourmet
- Mini belle blend
Popular Bell Peppers Varieties: A Rainbow of Choices
As the chameleons of the vegetable world, bell peppers can be green, red, yellow, orange, and even purple. From the sweet, fruity flavors of fully grown reds and oranges to the grassy, slightly bitter bite of green peppers, each color brings a unique flavor quality. Herbs like Sweet Chocolate Bell, if you’re looking for something more unusual, have a rich, rich sweetness that tastes like freshly picked right out of the garden.
Choosing Varieties Based on Climates
I’ve discovered that bell peppers grow when given the proper growing climate:
Cold areas or shorter summer season climates: choose faster-maturing varieties such as the Mini Belle Blend (60 days), which gives you delightful snack-sized fruits, or the Early Sunsation Hybrid (69 days to maturity), which produces sunny yellow peppers quickly.
Warm, sunny long-season climates: Try growing California Wonder (75 days) or Ozark Giant (70–85 days), which take their time but yield bountiful harvests of tasty, thick-walled fruits.
Matching Varieties with Your Garden Type
Choosing the right bell pepper also greatly relies on how your garden is set up. When working with containers or small spaces, limited types, such as mini belle blends, can be a lifesaver. They are perfectly suited for balconies or galleries, and their small size doesn’t compromise on taste or variety.
Longer varieties, such as Ozark Giant or Gourmet, thrive on raised beds or traditional garden plots for those who require more space. Just be ready to throw some support to those giant plants—all those delicious fruits can make them heavy!
Heirloom vs. hybrid varieties
I love experimenting with hybrids and heirlooms. Heirlooms, such as Ozark Giant and California Wonder, provide an unmatched taste and a link to gardening tradition. If you want to grow something genuinely unique and save seeds, these are ideal. However, if you’re seeking ease and consistency, hybrids like Early Sunsation and Gourmet are excellent options because they’re designed for large yields and disease resistance.
Personal Recommendation
Don’t hesitate to try something new! To get the best of both worlds, I love growing a mix of hybrid and heirloom varieties. My Sweet Chocolate Bell peppers were the talk of my garden one year, and my children loved the little Mini Belle Blend, which was the ideal snack right off the plant. No matter what kinds you select, I promise you are going to love seeing those vibrant colors fill your garden.
There is a bell pepper variety waiting to take the spotlight in your garden—and on your dinner table—regardless of your climate, garden type, or level of experience.
Understanding Growing Conditions
Understanding the perfect growing conditions for bell peppers is the first step in successfully growing them. Trust me, these plants will repay you with colorful, sweet, and crispy fruits if you give them what they need.
After years of pursuing my love of gardening, I’ve discovered—sometimes the hard way—that bell peppers are like spoiled visitors; they flourish in ideal conditions. Here’s how to give them the ideal environment for growth:
🌡️ Temperature
For peppers, temperature provides a unique benefit. They thrive at temperatures between 70 and 85 degrees Fahrenheit during the day and tolerate temperatures as low as 55 degrees in the evening. I remember a year when my weak peppers recently slowed down due to an unexpected freeze or cold weather.
Right now, I wait till the weather has fully warmed up in the pre-summer before setting them out. If you live in a colder climate, you may want to begin growing your peppers indoors or use column covers to provide extra warmth. However, a little nighttime shade can protect them from temperatures above 90°F in hot conditions.
☀️ Sunlight
Bell peppers are sun-loving plants that require 6 to 8 hours of full sun per day to thrive. If the terrace or garden receives enough sunlight, you’ll be halfway there! I’ve found that peppers that receive enough sunshine become stiff and yield fewer fruits.
Planting peppers in containers allows you to move them to follow the sun, which is like chasing their pleasure if you have a limited amount of sunny areas.
🟤 Soil
It makes sense that bell peppers are choosy about their soil. They love well-draining, nutrient-rich soil, which supports their heavy maintenance needs. In my experience, the ideal pH range for them is between 6.0 and 6.8, which is slightly acidic to neutral. In the unlikely event that you are unsure of the pH of your soil, a simple soil test pack can be really helpful. This is how I realized that my garden needed a little calcium to balance the acidity.
Keeping the joy and health of your plants requires adding natural modifications. A good start can be given by fertilizer, mature compost, or a light coating of natural manure such as bone meal or blood meal. One trick I’ve used is mixing manure into the soil before planting and using it as a side dressing in the middle of the growing season. My peppers reward me for providing better, more juicy organic products regularly.
Tip For Gardners
The bell pepper prefers regular moisture over wet feet. Make sure your surface drains well, and if you’re filling containers, use a good prep mix that doesn’t get soggy. Mulching the plants retains moisture, kills weeds, and maintains a consistent soil temperature—extra attention for less watering on hot days.
Bell peppers will grow well and take the spotlight in your garden if you provide them with the proper amount of sunlight, warmth, and soil care. I always feel like a proud gardener when I see those tiny green buds blossom into bright, brilliant fruits, and I know you will too!
Planting Bell Peppers
You get to see the whole process from small seeds to vibrant, fruit-producing plants when you start bell peppers from seeds. It’s like going on a little trip. The payoff is worthy of the patience required (and around 75 days for green peppers or an extra couple of weeks for their full-color change). With a little help from my personal experience, here’s how to prepare your peppers for success.
When and How to Start Seeds Indoors?
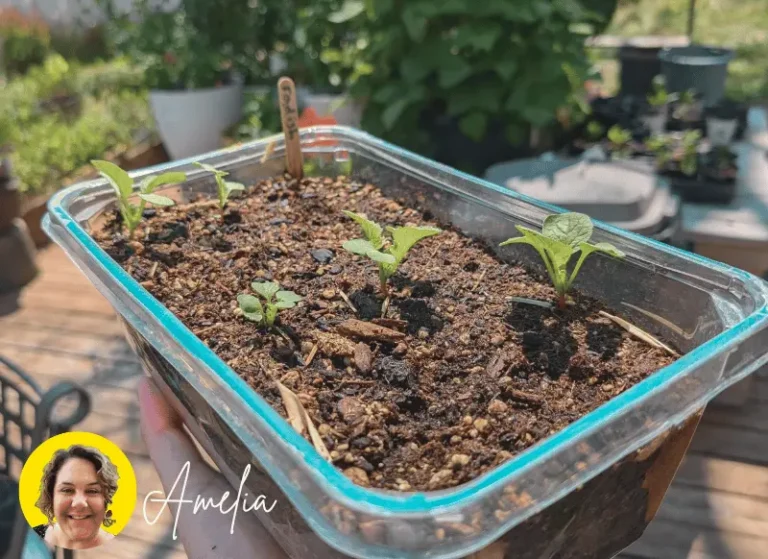
When it comes to planting peppers indoors, timing is crucial. It’s best to start 10–12 weeks before your last expected frost date because they are slow growers. In case you are unsure of that day, you can quickly determine it by consulting local setting guides or a gardening app. Two months before moving, I usually don’t do anything to give the seedlings enough time to grow strong roots without becoming very tall.
To start:
- Seed trays or little pots should be filled with a light seed-starting mix that drains well.
- Water the seeds carefully and plant them approximately 1/4 inch deep.
- To keep the trays wet, cover them with glass wrap or plastic caps, creating a mini greenhouse.
Tools
I use grow light seed trays and heating mats as crucial tools. I use grow light to provide my seedlings with 12 to 16 hours of light every day because natural light can be unstable. As the plants grow, move the lights to a position that is only a few inches above the trays.
Heating Mats: Bell peppers flourish at temperatures of about 80°F because they adore warmth. Growth becomes faster (typically within 7–10 days) by placing a heating mat below the trays. It changed my setup, as without one, my growth rates were much lower.
Hardening Off
Your seedlings will be ready to go outside after 6–8 weeks of indoor care. But hang on! You will need to harden off bell peppers first because they are a little sensitive to abrupt changes.
Just follow my method:
- Start slowly: Place the trays outside for a few hours every day for seven to ten days before transplanting.
- Increase their exposure to lower temperatures, wind, and sunlight gradually.
- They will be prepared to manage complete external conditions by the end of the week.
I had to learn this lesson the hard way when I missed this process my first year and had burnt, withered plants. Now, before I put my peppers in the garden, I make sure they are completely adjusted.
I have created a tool to check pepper growing timeline tool, Just enter your last frost date and that’s it.
Pepper Growing Timeline Calculator
Planting in Different Garden Types
Yes, you can grow all types of bell peppers in different types of gardens, like in containers, raised beds, and outdoor gardens. But the conditions will be different for each type of garden, so you need to know everything about these gardening types. Here’s a quick guide from my gardening journey:
Containers
If you have limited space or want to add some greenery to your terrace or balcony, growing bell peppers in containers is a game changer. Trust me, container gardening is just as enjoyable as planting in the ground, and I’ve learned a few tricks over the years to achieve the best results.
How to grow vegetables and herbs in container? Complete Guide
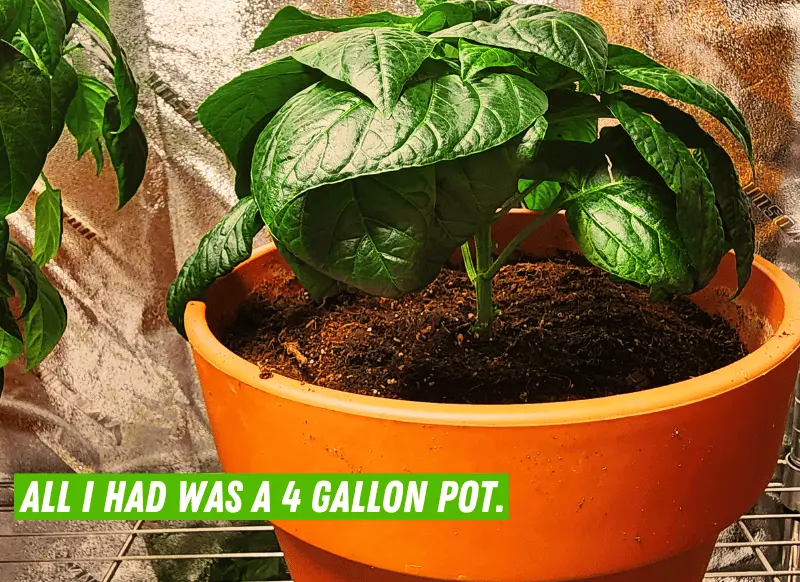
Size matters: Choose a container that is at least 12 to 14 inches wide and deep, as bell peppers require space to spread their underlying roots. Go far bigger for bigger varieties, such as Ozark Monster.
Material selections: Fabric grow bags have been an amazing hit for me; they are ventilated, lightweight, and prevent overwatering. While they can dry out very quickly, clay pots are also excellent. Peppers cannot tolerate laying in soggy soil, so choose containers without seepage holes. If there aren’t any gaps in your pot, drill a few to ensure natural seepage.
Best Potting Mix: Choose a potting mix that is light and well-draining and made especially for pots. Pots cannot use garden soil because it is too hard and readily compact.
For the sake of airflow, I like to add a handful of perlite or vermiculite and some compost for additional nutrients. To keep the plants nourished for weeks, add a small amount of fertilizer with a slow release to the mix.
Watering: Look at the soil every day, especially in hot weather, because containers dry up more quickly than garden beds. I water deeply till the top inch of soil feels dry to the touch, but only after it drains out of the base. Avoid drowning your plants with water because this might lead to root damage.
Fertilizing: Because peppers are heavy feeders, even a small amount of extra care will go a long way. Once the plants start to grow, start with a good compost every two to three weeks. Move to one with more potassium and phosphorus when they begin to bloom to stimulate the production of natural products. My preferred option for containers is liquid compost because they are easy to use and produce results quickly.
Container Gardening Calculator for Bell Peppers
Container Requirements
Essential Container Features:
- Fabric grow bags: Best ventilation, prevents overwatering
- Clay pots: Excellent drainage, may dry quickly
- Plastic containers: Affordable, lightweight
Perfect Potting Mix Recipe
- Light potting mix base
- Perlite or vermiculite for aeration
- Compost for nutrients
- Slow-release fertilizer
Watering & Fertilizing Schedule
- Check soil moisture daily
- Water when top inch feels dry
- Ensure proper drainage
- Increase frequency during hot weather
- Initial growth: Compost every 2-3 weeks
- Blooming stage: High potassium/phosphorus fertilizer
- Preferred: Liquid compost for quick results
Container Size Calculator
If you want to watch the whole procedure of pepper gardening in containers step by step, then watch this:
Raised Beds
Prepare the bed by filling it with a mixture of manure, potting soil, and peat moss or coconut coir to keep it moist. Furthermore, raised beds simplify planning. I plant my peppers in perfect lines, about 18 to 24 inches apart.
The reason why elevated beds are so popular They are easy to weed, drain well, and warm up more quickly in the spring. Moreover, my back is doing well because I won’t have to bend around anymore.
Outdoor Gardens
Prepare the soil by digging it and mixing it with aged manure or compost. Well-draining, loose soil is ideal for bell peppers.
The typical row spacing should be 18 inches apart, with rows 24 to 36 inches apart for proper growth.
I must say that each setup has a unique charm, and trying out different styles keeps gardening fresh and will also keep you interested in your garden. If given the proper care, bell peppers will thrive in any setting, whether it’s a sun-drenched balcony planter or a perfectly spaced row in a garden bed.
Use ‘My Pepper Garden Planner’ to Plan Your Perfect Pepper Garden
Before diving into the different garden types, use this interactive planner to visualize your pepper growing setup. Simply enter your available space, choose your preferred garden type, and select your pepper variety. The planner will calculate how many plants you can grow, provide estimated yields, and give you customized recommendations for success.
Just input your garden details below to get started
Pepper Garden Planner
Your Customized Garden Plan
How to Care for Bell Pepper Plants
It is critical to take proper care of bell pepper plants after they have been planted, and this is a common topic of discussion. Many people are always looking for the best tips on how to do it correctly. At this stage, concentrating on bell peppers is a joyful task that ensures healthy, vibrant plants and plentiful harvests. Based on my personal experience and a few case studies, this is how to keep your peppers cheerful.
Watering
For bell peppers to be healthy and productive, proper watering is crucial, and consistency is the first step. To help the seedlings adjust to their new environment, water them every day for the first week after planting. Once they’re grown, move to deep watering every two to three days. This encourages the roots to grow deeper, which makes the plants more flexible and tolerant of dry conditions during those hot mid-year days.
Watering Frequency for Different Setups
- Containers: You must check the soil every day because these dry up more quickly. Rinse well until the water runs off the bottom.
- Raised beds: Provide better moisture retention while still allowing heavy soaking to reach the root zone.
- Outdoor gardens: Because of the natural soil conditions, these usually need less frequent watering, but pay attention to weather changes.
Deep vs. surface watering: To ensure water reaches the root area, always aim for deep watering. Weak roots and weakened plants might result from shallow surface watering. My approach is to keep the soil around the plant’s base moist without going overboard.
Checking for moisture: I use the old-fashioned finger test, so I need to remember about expensive moisture testers. If the soil feels dry when you stick your finger about an inch deep, it’s time to water. Do not proceed if it is still wet.
Signs of over-watering and underwatering: There are multiple alert signs of overwatering, including yellowing of the plant’s leaves, moist soil, and stunted growth. On the other hand, your pepper plant is thirsty if the soil feels dry, the growth of fruits slows down, and the leaves look wilted or drooping.
Fertilizer
How well you prepare your bell peppers can greatly influence how large your harvest will be. Timing and balance are crucial whether you choose synthetic fertilizer such as balanced NPK blends or organic fertilizer like compost or fish emulsion. When moving, start with a light manure to help the young plants grow critical areas of strength. For healthy leaf growth when the plants go into the vegetative stage, focus on a compost that has more nitrogen.
Don’t go crazy, though, or you’ll end up with lush leaves but fewer flowers and organic items. Move to a phosphorus-rich mix after flowering begins to aid in sprouting and improve organic products. I’ve learned from my expertise how to care for my peppers three times a month, adjusting according to the way they look at the plants. You may avoid the mystery by using a soil test to determine exactly what your plants require.
Mulching
When it comes to keeping healthy and flourishing plants, mulching your bell peppers is creative. Mulch comes in multiple forms, such as bark mulch, pine straw, composted leaves, or wheat straw, and each is appropriate for a particular garden layout. While raised beds and outdoor gardens benefit from heavier coverings (3–4 inches) to retain moisture and reduce weeds, containers benefit from a light mulch layer to prevent quick drying. Mulch also controls soil temperature, which is ideal for peppers, especially on hot mid-year days.
In my opinion, regular mulches like pine or wheat straw work wonders, but be careful—mulch may harbor insects like snails or slugs. Before mulching, wait until the seedlings are firm and a few inches tall. If you are using wheat straw, make sure it is seed-allowed and stay clear from shock weeds. Mulch has given my peppers the perfect growing environment, saved me several watering trips, and kept my garden neat.
Supporting Plants
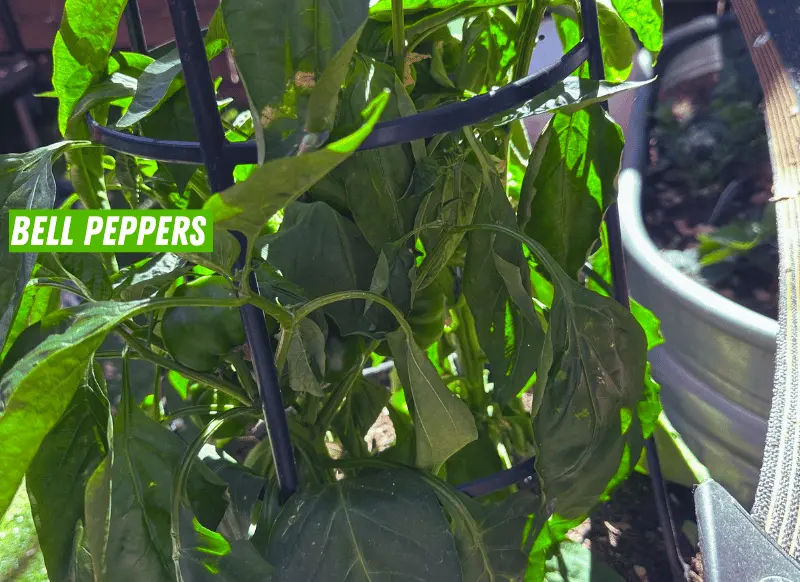
If you want to maintain the health and productivity of your bell pepper plants, you need to give them proper support. If not properly cared for, the delicate pepper stems can easily break as the fruit grows. I’ve found that stakes or a tiny tomato cage work well for that crucial support.
Pluck off the top leaf grouping when your plants are around 6 to 8 inches tall to encourage parallel growth. It also helps the plant grow more robust by making it larger, preventing it from becoming too unbalanced. I use stakes in raised beds and outdoor gardens, carefully wrapping them around each plant’s base. A small cage or simply a simple bamboo stake works well for containers. You can prevent broken stems and a lot more problematic harvest later if you give support right away.
Maximizing Bell Pepper Yield
I can say with experience that there are a few planned steps you need to take to maximize the yield of your bell peppers. Pruning can help focus the plant’s energy on growing fruit, but it is not strictly required. If you see branches that are not producing buds or natural products, cut them off with a sharp, sterile pruner.
I usually cut these branches at the bottom to help the plant focus its resources on the above organic product-bearing sections. Bell peppers are self-pollinating in terms of fertilization, but you can increase the harvest by securing pollinators such as honey bees. Better fertilization can be facilitated by placing flowers nearby or even by lightly shaking the plants.
Managing Pests and Diseases
If your bell peppers face a small pest attack, there’s no need to worry because I have a solution for that too. Growing attractive bell peppers needs managing pests and diseases, and I’ve learned a lot from my own experience over the years on how to do it.
Common Pests
A healthy bell pepper plant can face minor pest attacks, but some pests can create serious problems. Among the common suspects I’ve dealt with are aphids, whiteflies, and termite bugs. For example, aphids enjoy sucking sap from the leaves, which weakens the plant and spreads disease. Try using a natural insecticidal cleaner or spraying your plants with a soapy water solution if you see these problems. Synthetic insect repellents can be useful for serious issues, but for true peace, I prefer natural solutions.
Some pests, like hornworms and pepper weevils, can be quite dangerous. By depositing their eggs in the tissue and allowing the hatchlings to dig through, pepper weevils destroy vegetation by creating decay. When ignored, hornworms can destroy a plant of its leaves, and insect pests frequently target tiny seedlings. If you catch these problems early, picking out can be quite effective. Furthermore, using line covers can prevent some of these pests from ever reaching your plants.
Common Diseases
Peppers feel helpless against a few common diseases such as mildew, bacterial spots, and bloom end rot, which is often caused by a lack of calcium. It’s crucial to carefully inspect your plants, while parasitic infections, in particular, can spread quickly.
I’ve found that reducing the risk of infection can be aided by preventive measures like yield changes, practicing good soil management, and proper cutting. Protecting your peppers’ durability requires you to make sure they have enough vitamins and minerals and soil that drains them.
Bell Pepper Pest Management Guide
🐞 Symptoms: Sap-sucking insects that weaken plants and spread disease
🌿 Prevention: – Use natural insecticidal soap – Spray plants with soapy water solution – Inspect plants regularly
🐛 Symptoms: Can strip leaves, especially dangerous for seedlings
🌱 Management: – Early detection is key – Manual removal when spotted – Use row covers to prevent infestation
🐞 Symptoms: Lay eggs in plant tissue, causing decay
🛡️ Protection: – Regular plant inspection – Remove infected parts immediately – Consider preventive row covers
🍄 Symptoms: Mildew, rot, and bacterial spots
🌞 Prevention: – Ensure proper soil drainage – Maintain good air circulation – Practice crop rotation – Keep plants clean and well-nourished
Containers Specific Pests Challenges
Growing in containers can make pests a bigger problem because of the limited space. To avoid soggy conditions that promote rot and fungal diseases, make sure the soil drains properly. I’ve noticed that keeping the containers clean and conducting routine inspections of pests helps prevent bugs. It’s better to take care of any problems as soon as you see them so they don’t affect other plants.
Harvesting Bell Peppers
Oh yeah, it’s time to harvest! When a gardener finally gets the best harvest after giving their best, it is such a lovely feeling. Truly, getting the fruits of your hard work is a moment of happiness. For gardeners like me, who grow something throughout the year, we get to feel this happiness all year long. Timing is crucial, but harvesting bell peppers is a rewarding part of the experience.
The best time to harvest depends on the variety you’re growing and your color preference. To harvest green bell peppers, harvest them when they reach their maturity level, but if you’re waiting for them to turn red, yellow, orange, or purple, you’ll need to wait another six weeks. When they feel strong, have a pretty load, and are uniformly hued, you’ll know they’re ready.
When it comes to harvesting techniques, always use a hand pruner or a sharp, sterile snipper to carefully clip the natural product from the plant. To avoid damaging the pepper, make sure to keep about an inch of the stem left. Be careful with the plants if you’re filling in raised beds or containers because they may be more fragile in these settings, especially if there is a lot of fruit hanging. The same rule applies to outdoor gardens, but take care not to grab too hard on the fruits, as this could shatter the plant or nearby branches.
After harvesting, storage is easy. You can store bell peppers in the refrigerator for one to two weeks. If you have extra, you might want to freeze them. Before freezing, wash, seed, and cut the peppers; they will keep for eight to ten months. Another excellent choice is to use a dehydrator or thinly slice your peppers and let them air dry if you prefer that method. If you have a large number of peppers that are maturing at the same time, this works nicely!
Some Advanced Tips for Experienced Gardners
There are a few advanced tips to think about for success if you are an experienced grower hoping to step up your bell pepper game!💧 Tip 1: Overwintering Bell Peppers
Getting to enjoy long-term growth with your bell peppers is one of the delights of working in a carefully organized garden. Before the big frost comes, bring the plants inside and cut back your peppers to overwinter them. Throughout the winter months, keep them in a bright, cool location (such as a windowsill) and water them sparingly. Your pepper plants will be ready to jump into harvest once more!
🌱 Greenhouse Setups
A greenhouse setup is the best option if you want to produce all year round. You can prolong your growth season, keep pests away from your plants, and guarantee the ideal climate and moisture for bell peppers by keeping your environment under control. It’s like giving your peppers year-round VIP treatment!
🌿 Growing Rare or Ornamental Variety
Try growing rare or elegant bell pepper varieties for something fun and unique! With colors ranging from purple to deep dark, these peppers can truly be a work of art in the garden. In addition to their impressive looks, some of them can have strange tastes or different levels of strength, which makes them a great way to start a conversation at any garden party.
Conclusion
Overall, growing bell peppers may be a profitable activity, even if you’re doing it in a traditional garden, raised beds, or containers. This article covers everything you need to know about pepper fixes, from picking the perfect variety to providing proper consideration, such as watering, fertilizing, and nurturing plants. With advice on increasing yields, managing pests, and, shockingly, advanced techniques and more with confidence.
We would love to hear about your planting experiences, so please share your successes, challenges, and advice in the comments section below. Further, while you grow your greatest peppers so far, don’t forget to download our printable consideration manual to keep this wealth of experiences ready. I’ve put a lot of effort into making this detailed, interesting, and highly useful guide, and I hope it proves to be very helpful for you. Stay connected with us for more valuable guides in the future!

About Author
Welcome! I’m Amelia, your dedicated gardener and passionate advocate for all things green.Explore my gardening journey through beautiful photos, insightful articles, and helpful tips. If you have any questions or just want to connect, feel free to drop me a note. Let’s grow together!

