Grow Hot Pepper Indoor Guide: Raised Beds & Containers
Do you prefer using hot peppers and adding fiery or hot flavors to your meals? If yes, then this guide will be very beneficial for you. Trust me you will love this procedure just as much as I did. There are many benefits to growing hot peppers at home. One of the most satisfying gardening tasks I’ve tried over the years is increasing hot peppers indoors.
With 80% of Americans enjoying hot food and many using it in their cooking, hot peppers are increasingly popular. Why not grow your hot peppers if you enjoy a good spicy meal? As someone who has been involved for a long time, I believe that nothing compares to having fresh, spicy peppers on hand.
You can select from a variety of colors, types, and intensity levels that aren’t available in stores when you make your own. The pleasure of harvesting straight from your plant, improved pest management, and year-round harvests are further benefits of indoor growing. Are you ready to start? We want to find the perfect varieties for you! So let’s dive in and grow best.
Choosing the Right Hot Peppers Varieties
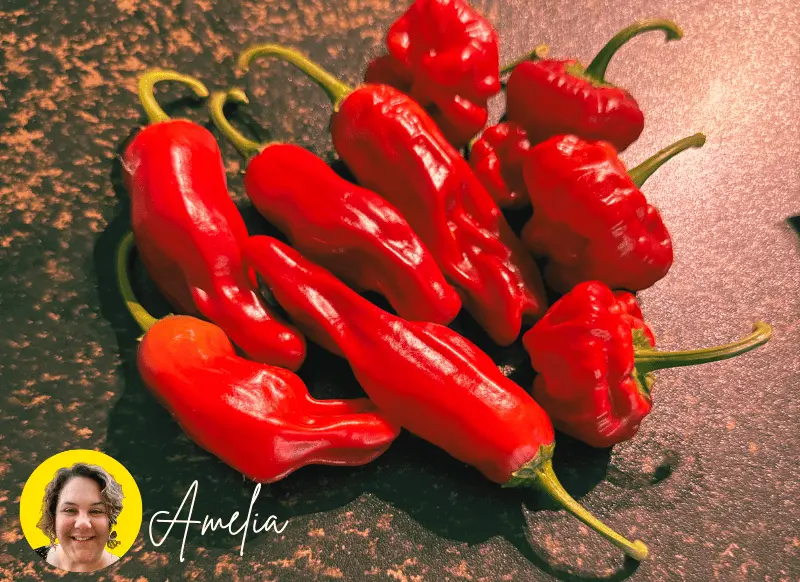
The key to selecting the best hot pepper types for indoor use is to balance your tastes with the space you have. The trick to success is choosing peppers that grow well in smaller places but still give you the spice or taste you enjoy. Over the years, I’ve tried everything from mild and tasty to blazingly hot. Here are my top suggestions:
Mild Peppers
- Seña peppers are ideal for people who like a little flavor without being overly hot.
- Poblano peppers are excellent for roasting and stuffing because of their smokey flavor.
Medium Heat Peppers
- Serrano peppers are flexible and great for salsas; they are hotter than jalapeños.
- Anaheim peppers are perfect for grilling because of their mild to medium heat and slightly sweet flavor.
High Heat Peppers
- Thai Chilies: These little but powerful chilies are great in Asian dishes and stir-fries.
- Habanero peppers are ideal for daring cooks since they are fiery hot with a touch of citrus.
- Carolina Reaper: Carolina Reaper is one of the highest spiciest chilies in the world! However, heat isn’t just affected by variety; it can also change based on maturity stage and growth conditions.
I recently saw a meme about hot peppers in which a man eats one hot pepper and screams, “Ohh, I was not expecting this level of spice and heat!” It made me laugh so much!
Compact Indoor Friendly Varieties
- Jalapeños: A traditional option with compact growth and modest heat.
- Hybrid Varieties: Look for indoor-specific hybrids, such as NuMex Twilight or Basket of Fire, created for great yields and limited space.
When choosing, consider growth features and the Scoville scale (a measure of heat). While larger varieties like poblanos may need extra space, smaller plants like Thai chilies and hybrids are perfect for pots and balconies. Using different options for specific types will enhance the taste of your food and make your indoor gardening setup enjoyable and tasty!
Compare Pepper Varieties
Want to find the perfect pepper for your indoor garden? Use my interactive comparison tool to explore different pepper varieties side by side. Simply select any two peppers from the dropdown menus to see detailed information about their heat levels, growing characteristics, and best uses. Whether you’re a beginner looking for easy-to-grow varieties or an experienced gardener seeking your next challenge, this tool will help you make an informed choice for your space and cooking needs.
Try it below
Indoor Cultivation Preparation
Preparing hot peppers for indoor growing is an exciting journey that provides an ongoing supply of fresh, tasty peppers throughout the year. I’ve learned skills over the years of growing peppers inside that work very well for growing healthy plants and increasing harvests. In light of my observations, all the points given below will help you.
Choosing Location
Light Availability: Every day, hot peppers require 12 to 16 hours of light. If you have a south-facing window, you will receive the most natural light. LED grow lights are useful for locations with little natural light. To replicate natural sunlight, I suggest placing full-spectrum lamps 6 to 12 inches above the plants.
Temperature Control: The most suitable temperature range for hot peppers is 65 to 85°F.
Keep them away from heaters and cold windows. Conditions can be evaluated with the use of a compact indoor thermometer.
Container and Potting Mix
Selecting the right potting mix and containers can have a major effect on the growth of hot peppers. I’ve discovered throughout the years that taking care of these two issues will result in plants that are durable and fruitful. My tried-and-true advice is as follows:
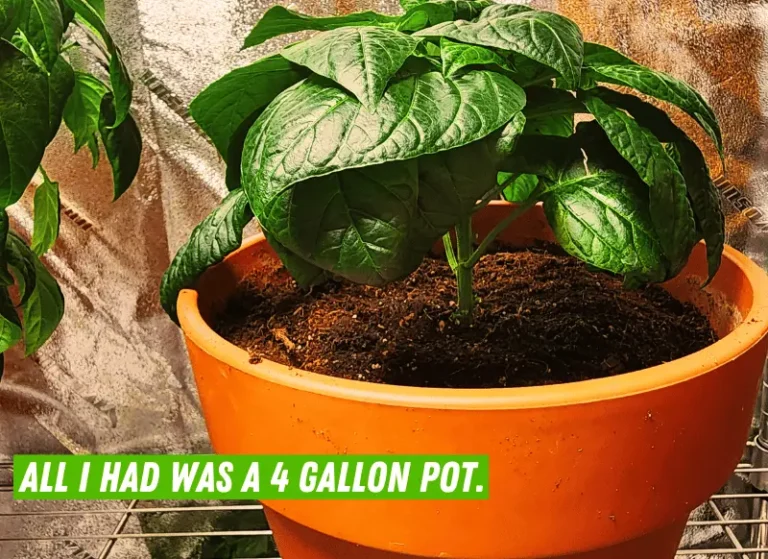
Size: A 2-gallon pot goes well for tiny peppers, such as Thai chilies. For larger varieties, such as bell peppers or habaneros, use a 3–5 gallon container to allow the roots to grow.
Stronger root systems are helped by deeper pots, leading to healthier plants and greater harvests.
Material: I’ve utilized everything from fabric grow bags to plastic pots. Although they dry out more quickly, fabric pots are my favorite since they give the roots better airflow; however, be sure to water them frequently.
Although terracotta pots are timeless and gorgeous, be ready to water them a little more frequently because they can draw moisture away from the soil.
Drainage System: Always use containers with enough holes for drainage at the bottom. By doing this, water cannot build up and lead to root rot.
If there aren’t any holes in your container, don’t be scared to get a drill and make some yourself; I swear it will be worth the extra work.
Potting Mix
For the potting mix, it is important to stay away from heavy, smaller garden soil. To give my hot peppers the best chance, I usually choose a fantastic, well-draining mixture. My method is blending 60% fertilized soil with vermiculite or perlite to enhance air circulation.
To maintain the proper level of moisture, I add 20% manure for an ongoing flow of supplements and 20% coco coir or peat greens. I also add organic fertilizer, worm castings, or more manure to further increase soil development and supplement quality because hot peppers hate spongy roots.
I use bone meal or slow-moving natural manure to give the plants a boost right away, which ensures a steady supply of nutrients throughout the growing season.
I add perlite or coarse sand to help loosen the soil and make sure the water drains properly in case drainage is a problem. As a way to help retain moisture without keeping the soil overly wet, I also like to apply a thin layer of natural mulch, such as straw or decomposed bark.
Finally, peppers thrive when the pH of the soil is between 6.0 and 6.8, so I usually test the soil and replace it as needed to maintain the ideal balance. Your hot peppers will thrive in the ideal environment and produce tasty, fiery veggies if you have the proper container and a supplement-rich, well-drained mixture.
Lightening Requirments
I’ve found that LED grow lights are such a true game changer in terms of lighting for indoor hot pepper gardening. Since hot peppers require a lot of light to flourish, I make sure the grow lights are on for 12 to 16 hours every day to simulate the long days they would have outside.
I regulate the process with a timer to make things simple and guarantee that the peppers receive a regular light cycle. To allow for robust, healthy growth without taking the risk of burning the leaves, I place the lights about 10 inches above the plants.
Tip For You
Guys, here’s a helpful trick I’ve learned over the years: rotate the pots every week. This simple action prevents the plants from tilting toward the light source and enhances their growth. I try to place my pots where they can receive the most consistent light because hot peppers love the sun, but I’ve noticed that it’s usually crucial to provide them with grow lights, especially on cloudy days or during the driest months. Giving your peppers enough light and regular watering will give them the best chance to thrive indoors, just like they would in a sunny garden.
See below guide video with full details:
Planting Hot Peppers Indoors
Growing hot peppers indoors can be very profitable if done correctly. I’ve honed my method over the years to make sure solid, strong plants flourish well when moved outdoors. This is how I go about it:
Starting Seeds Vs. Transplanting Young Plants
I prefer to start with seeds because they provide more variety and allow you to be in control of the whole process. Even though young plants are beneficial, starting seeds indoors gives you an edge on the growing season, especially in chilly climates like 5b. I usually start pepper seeds indoors around February or Walk because they require 40–60 days of indoor growth before moving outdoors.
Seed Starting Techniques
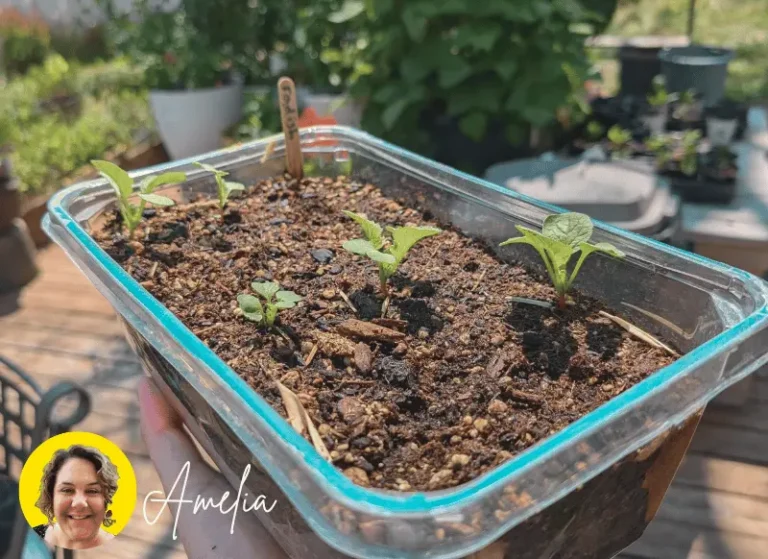
Pepper seeds need warm soil to germinate; I try to keep mine between 70 and 85°F. A heated mat is crucial for providing this consistent temperature. I use a light, well-draining seed-starting mixture, like a mixture of peat moss, vermiculite, and perlite, to fill seed trays or tiny pots. This mixture avoids waterlogging while keeping moisture.
My seeds are planted around 14 inches deep after soaking the mixture according to the instructions on the seed packet. Carefully mist the surface to avoid disturbing the seeds, and cover the tray with saran wrap or an airtight top to retain moisture and warmth. It usually takes 7–14 days for germination, depending on the variety.
I remove the cover as soon as the seeds sprout and place the seedlings under grow lights for 12 to 16 hours every day. Place the lights two to three creepers above the plants in crucial areas of strength for growth and empowerment. I make sure the soil is consistently moist, but I avoid overwatering because this can lead to damping-off disease.
Timing for Transplanting Seedlings into Large Containers
I move the seedlings into somewhat larger containers, about three to four inches in size, once they produce their second set of actual leaves. This prevents cramming and provides ample space for the roots to grow. I treat delicate seedlings with tweezers during the move and plant them a little deeper than before, carefully covering the stem with soil. This supports the growth of strong underground roots.
Final Transplant
The peppers should be moved outdoors around fourteen days after the last frost date when the evenings remain above 55°F and the daytime temperatures are consistently warm. I move them to garden soil or free, well-depleting soil that has been fertilized. At this point, the peppers are strong and ready to thrive in their highly durable houses.
Long periods of experimentation enhanced this cycle, which continually produced strong, productive pepper plants that gave plentiful harvests. Peppers will reward you with vibrant growth and tasty natural fruit if you are patient and attentive!
If you are a beginner, then watch this video; it will be helpful for all of you.
Watering and Fertilizing
A strong, energetic plant with a bounty yield can be achieved by properly watering and fertilizing hot peppers. I’ve seen over the years how to balance nutrients and moisture to suit their specific needs, and this is how I do it.
Proper Watering Techniques
Guys overwatering peppers can cause root rot and stunt growth. They prefer soil that is somewhat dry but not too dry. I simply water when I need to, usually every two to four days, depending on the temperature and humidity levels indoors.
I use the finger test, which involves putting your finger into the soil up to the next knuckle, to find out whether watering is required. If the top inch is dry on top but wet underneath, it’s not time to water. I water deeply, but rarely, to encourage strong growth of roots. To ensure regular moisture throughout the plant, I use a watering can with a fine spout to avoid disturbing the soil.
I’ve also experimented with a Blumat capable of programming water systems to ensure simplicity and consistency. It’s a fantastic system if you’re busy—it keeps the soil equally moist without needing power or timers, and I’ve observed amazing results using it.
You can get help from this video:
Fertilization
At different stages of growth, peppers require different nutrients. I use a balanced fertilizer with equal quantities of potassium, phosphorus, and nitrogen throughout the vegetative stage—a 10-10-10 mix. Nitrogen encourages solid, leafy growth, which is necessary for creating a sturdy root system.
I move to a high-potassium compost when flowering begins to promote the growth of plants and seedlings. Because potassium boosts flowering and fruiting while reducing nitrogen prevents needless growth of leaves at this stage, a 5-10-10 recipe works nicely.
Using a diluted solution, I fertilize every two to three weeks to avoid overloading. I usually choose mindfully and observe the plants’ responses because too much compost might lead to excess usage.
Sustainable Organic Choices
I utilize fertilizer tea during the vegetative stage for a more controlled approach. It is rich in beneficial bacteria and common ingredients that enhance soil health. I use fish emulsion or liquid kelp for blooming and fruiting because these are excellent natural potassium sources.
To naturally support phosphorus and potassium levels, you may also add wood debris or bone feast to the soil. Mulching with natural materials, such as straw or crushed leaves, reduces the need for regular watering, keeps in moisture, and releases nutrients gradually as they break.
By using these preparation and watering guidelines, I’ve continually grown sturdy, productive pepper plants. The secret is to maintain balance, avoid dryness or overwatering limits, and provide vitamins tailored to each stage of growth. If you take good care of them, your peppers will thrive indoors or out, and that’s a good tip.
Tip
Water hot peppers deeply but infrequently. To avoid overwatering, which can cause root rot, wait until the top inch of soil has dried completely before giving more water. Strong roots and stronger plants thrive by deep watering!
Interactive Hot Pepper Growing Guide
Follow the timeline and make decisions to grow successful hot pepper plants!
Stage 1: Seed Starting (February-March)
Set the ideal soil temperature for germination (70-85°F):
Current temperature: 75°F
Stage 2: Seedling Care
Position grow lights above seedlings:
Stage 3: First Transplant
When should you transplant seedlings to larger containers?
Stage 4: Watering & Fertilizing
How often should you water your peppers?
Maintaining Indoor Conditions
Growing hot peppers indoors requires balancing humidity, airflow, and plant care if one wishes to replicate outdoor conditions. I’ve realized throughout the years that focusing on these elements keeps my indoor peppers thriving.
Humidity
40–70% mugginess is the ideal range for hot peppers. If it’s too low, they will struggle with leaf loss; if it’s too high, parasite diseases can arise. To maintain ideal conditions during dry, cold weather, I frequently use a little humidifier near the plants.
In the rare circumstance that you lack a humidifier, simply misting the leaves two or three times a day works well. Standing water can empower shape, so just be careful not to go out of control. A shallow dish of water placed near the plants can typically aid in moisture for a simpler setup.
Air Circulation
For problems like powdery mildew and other fungal infections to be avoided, enough ventilation is needed. I observed the hard way that a crop that is otherwise healthy can be destroyed by stagnant air. By mimicking natural breezes, a small oscillating fan put on a low setting close by keeps the air flowing and fortifies the plants. To prevent uneven growth, frequently alter the fan’s direction.
Pruning and Staking
For indoor pepper plants to have a strong growth and wind stream, regular pruning is required. To give the plant more energy for yielding vegetables, I prune any packed, weak stems and lower leaves. Labeling or using small plant limits helps keep the branches straight and avoid breaking as peppers get bigger, especially if the fruit is heavy. I like to use bamboo stakes and tiny ties for support. Your hot pepper plants will stay robust, healthy, and fruitful throughout their growing season if these indoor conditions are controlled.
Pollination
Because there are no bees or breezes to aid in pollination, indoor pollination can be a little hard. You still need to help indoors, but luckily hot peppers are self-pollinating, meaning each bloom includes both male and female parts. Once you get the hang of it, you’ll find that hand pollination can be simple and efficient.
Using an oscillating brush is one of my favorite techniques. In basic terms, I turn it on and gently tap it against the flowers to create a slight vibration that helps shake the pollen. In case you are without a toothbrush, you can also mimic the vibrations by making a gentle, stirring motion with your hand.
A small paintbrush can also work very well; simply move pollen from one bloom to the next and brush lightly inside each one. This helps with the fruiting set, and I usually do it more than once a day, especially after the flowers are fully sprouted. Your peppers will thrive indoors and yield a lot of tasty fruits if you adopt the role of mom nature!
Common Problems and Solutions
There are specific challenges in growing hot peppers indoors, especially in dealing with diseases, pests, and nutritional problems. I gained a skill to identify and tackle a few typical problems throughout the many years of experiments.
Pests
While slugs and cutworms are more of an issue in the early stages when your plants are still young, aphids, spider mites, and flea beetles are common visitors. I use bands around the base of seedlings to keep cutworms away and handpick slugs. I just apply neem oil as a natural repellant or gently spray off the fleas and aphids with water. Another excellent organic solution for obstinate pests is insecticidal soap.
Diseases
It might be challenging to deal with parasite infections like anthrax and botrytis as well as root rot. I’ve found that the key to avoiding these problems is a strong wind and the right spacing. To reduce the risk of parasite infections, water the soil often while avoiding wetting the leaves. If you’re growing peppers in the same location for many years, consider creating disease-safe varieties and using crop rotation if you’ve experienced frequent issues.
Nutrient Deficiencies
Keep watching out for symptoms like as yellowing leaves or stunted growth, which may indicate a lack of nutrients, especially potassium or nitrogen. If you see this, try a high-potassium herb or a fair natural manure during flowering and fruiting to fix it. likewise regular fertilization ensures that the remaining parts of the soil are rich in nutrients and promotes healthy pepper growth.
You can easily keep your peppers happy and healthy by being attentive and utilizing organic ways!
Harvesting Hot Peppers
Yahoo! Its time to harvest. Oh, it was a long time, but now its time to get a fruitful harvest. When to harvest peppers will also depend on where you live and when you first started. For example, you’ll usually begin harvesting peppers in August or October if you started in June (the precise period will depend on the kind of pepper).
In the same way, others who planted before you might keep harvesting for two or three months. You will undoubtedly have your pepper crop shortly if you don’t live in a cold area. Simply take patience!
One of the most enjoyable parts of growing hot peppers indoors is harvesting them! I’ve observed during the gardening periods that if you want to get the most from your crop’s potential, timing and technique are crucial.
Signs of Ripness: When the peppers reach their full color—red, orange, yellow, or any other hue that each one should have—they are ready. For example, Serrano peppers turn a vivid red, and jalapeños should be firm and dark green. Taste testing a small chomp can help you identify when they’re ready to gather because the pepper’s heat grows as well with maturity!
Harvesting Tip: I usually cut peppers from the stem rather than cutting them off with garden scissors or sharp pruners to promote continual harvest. By doing this, the plant remains secure and its ability to continue growing is secured. Also, I try not to harvest too many at once so that the plant may focus on producing more fruit.
Storage and Preservation: I like to keep my peppers in a dry, cool place after harvesting. If I have more than I can use right away, I freeze or dry them to preserve them. While drying works well if you need to make pepper powders or bits, freezing is ideal for keeping taste. To keep them fresh, just be sure to put them in an airtight containers or boxes.
🌶️ Hot Pepper Growing Checklist
A comprehensive guide to successfully growing hot peppers
🌱 Seed Starting & Preparation
🐞 Pest Prevention
🌿 Plant Care & Nutrition
🌶️ Harvesting Preparation
You can enjoy an ongoing and healthy harvest all season long if you follow these guidelines. Enjoy your harvesting!
Creative Tips for Indoor Pepper Gardening
Here are some useful and creative tips for you guys:
Tip1 ☀️: DIY Grow Lights Hacks
DIY Grow Lights Hacks: Use cheap LED light strips or shop lights to create your own DIY grow lights. To imitate the intensity of sunlight, hang them two to three inches over your peppers. The plants can receive more exposure without having to buy pricey grow lights if they are covered by reflective supplies like Mylar or white paint.
Tip2 💦: Self-Watering Containers
Bell peppers are sun-loving plants that require 6 to 8 hours of full sun per day to thrive. If the terrace or garden receives enough sunlight, you’ll be halfway there! I’ve found that peppers that receive enough sunshine become stiff and yield fewer fruits.
🟤 Companion Planting
Plants like marigolds, which offer color and prevent harmful insects, or basil, which repels rodents, are good companions for peppers. When grown near peppers, parsley or garlic can also be beneficial because they enhance flavor and provide regular pest management. Just remember to keep your distance to ensure that every plant has space to grow.
Conclusion
Growing hot peppers indoors is a profitable and also joyful journey that provides year-round access to fresh, delicious harvests. You can definitely create a successful indoor garden with careful planning, which includes choosing the right varieties and providing the right balance of light, temperature, and moisture. Enjoy the benefits of better pest control, easy access, and the joy of growing your own food.
Try a variety of pepper collections to find your favorite, from mild jalapeños to fiery habaneros, and be creative with techniques like companion planting or tank-farming. Tell others about your experiences and advice; it’s all necessary for the fun.I hope you found this guide interesting and that it has helped you grow hot peppers. Please share your own experiences and let me know if it was helpful in the comments section. See our other guides for more gardening advice! Happy Gardening!

About Author
Welcome! I’m Amelia, your dedicated gardener and passionate advocate for all things green.Explore my gardening journey through beautiful photos, insightful articles, and helpful tips. If you have any questions or just want to connect, feel free to drop me a note. Let’s grow together!

