Peppers in Pots and Containers: Grow, Care & Harvest Guide
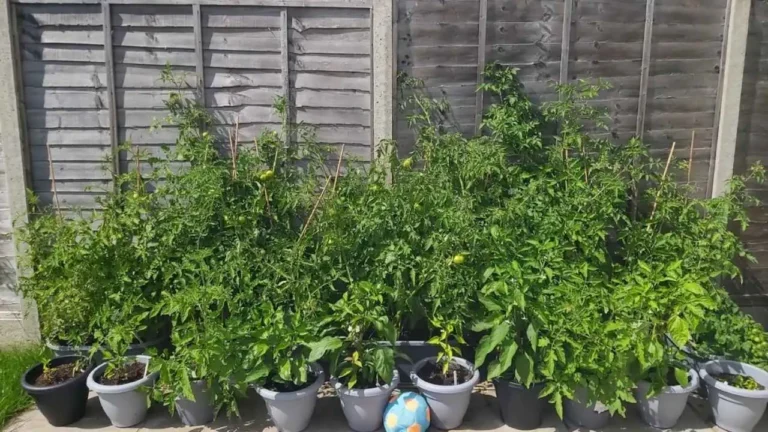
Ever thought about growing your favorite peppers in a small space? Imagine stepping onto your balcony and harvesting vibrant, flavorful peppers right from your pots! If you have limited space in your home but still want to grow fresh peppers and vegetables, don’t let that stop you. Whether in a tiny garden area or on a balcony, you can grow an amazing harvest of peppers in small pots or containers. In pots, peppers grow well, whether sweet or hot.
I can guide any new gardener, even with how much space they have, because I have a lot of planting experience and have also seen my grandparents’ garden. I was too excited when I grew peppers in my garden for the very first time, and then I tried to grow the same vegetables (hot peppers or sweets) in containers for those people who did not have enough space.
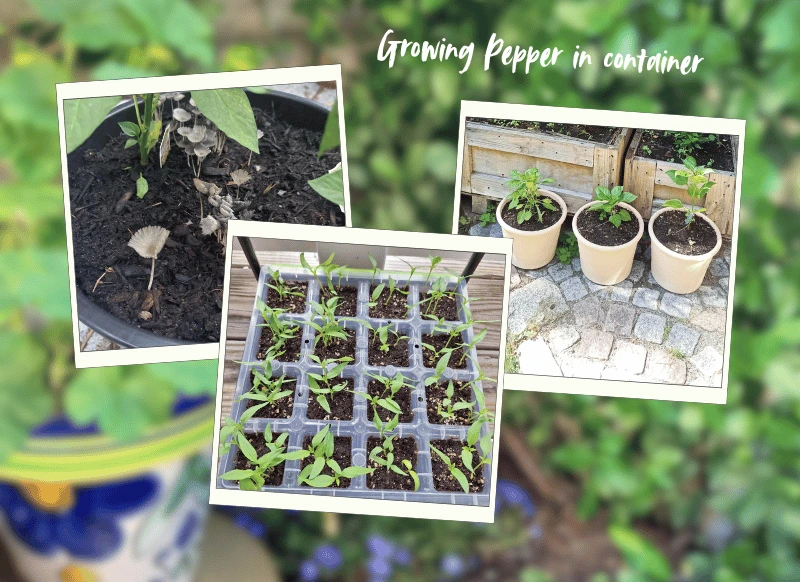
Many people need to grow peppers at home because they are undoubtedly one of the most desired vegetables. Those who want the best peppers will find this guide beneficial. Join us for the whole process if you’re ready to grow something unique and best.
Why Grow Peppers in Containers?
A chance to enjoy a variety of fresh peppers, both hot and sweet, is the biggest benefit of growing peppers in containers. As I’ve been gardening for a long time, I think container growing is a great option for peppers. Let me explain why this method is unique and why it might be the best choice for you:
Benefits of Growing Peppers in Containers
📏 Space Saver
In small gardens, balconies, and terraces, you can grow fresh, delicious peppers in containers without taking up a lot of space. For city gardeners or anyone with limited space, this flexibility is a clear benefit.
🌱 Easier Maintenance
Container gardening has proven to be less demanding on my health. Having a smaller, more tightly controlled area means less weeding, focused watering, and simple fertilizing.
🎨 Attractiveness
Peppers, especially colorful varieties such as bell peppers, jalapeños, and intricate varieties, twice as high as beautiful additions for terraces or balconies. I’ve had guests comment on how my colorful orange and red peppers in colorful pots make my outdoor area more appealing.
🛡️ Protection from Pests and Diseases
I’ve seen over the years that peppers grown in containers typically have lower rates of soil-borne diseases and pests like nematodes. If necessary, you may quickly identify issues and relocate the pots to a safer area.
🧪 Perfect for Experimentation
Eventually, I’ve enjoyed experimenting with different options and unique varieties. Using containers makes it easy to dedicate a single pot to a unique variety without taking up a large area of the garden. This is how my love for chocolate chime peppers began!
When I first started, I was curious if peppers would thrive in pots. However, after a few experiments, I now feel free to grow everything from sweet bells to blaze habaneros in containers. There’s no deeper sense of satisfaction than going outside to harvest fresh peppers from pots just a few steps from my kitchen.
How to grow vegetables and herbs in container? Complete Guide
Choosing the Right Pepper Variety
When I first decided to grow peppers, I started with some common varieties, but there are many more. When I decided to grow peppers again in containers, I did a lot of research and read a lot of discussions on forums like Reddit about the different types.
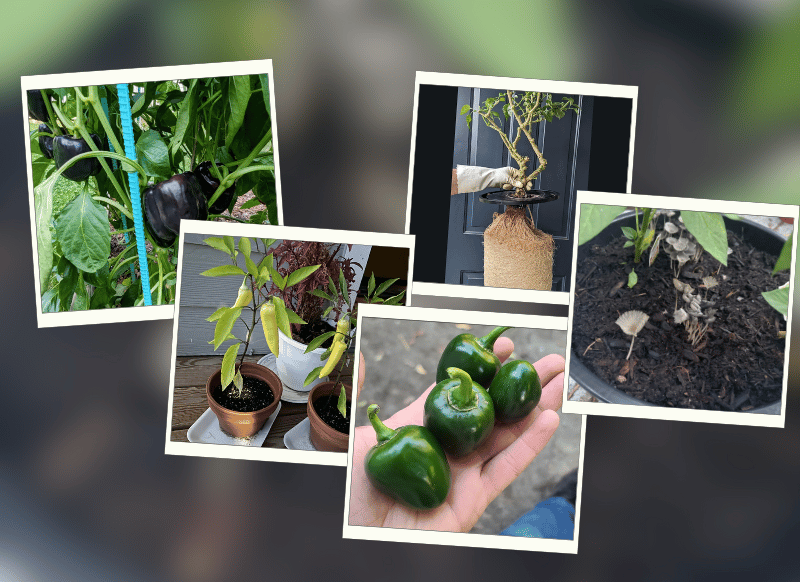
Then I decided to grow and also experiment with some of my favorite peppers, such as bell peppers, cayenne, habaneros, poblanos, California wonders, jalapenos, hot bananas, and red scotch caps. You can grow any of these sweet or hot pepper varieties according to your preferences. Here I will differentiate some popular types of sweet peppers and hot peppers.
Best Popular Sweet Peppers Types
- California Wonder
- banana peppers
These are excellent for containers because of their smaller size and the number of bell peppers they produce. They can adjust well to the small space and grow in containers.
Popular Hot Peppers Types
- Cayenne
- Poblano
- Habaneros
- Jalapeño peppers
These are also great for container growing. These types are perfect for pots because they are often smaller in size. They also need less space to grow and typically grow faster.
Tip on Choosing Varieties Suited for Containers
Look for pepper varieties that are shadowed or minimal. As bases don’t need as much space to spread, tiny plants generally perform well in containers. The plant’s light and water requirements should also be considered. Because containers can dry out more quickly, choosing varieties that can endure a dry season and receive plenty of sunlight for growth is important.
Pepper Variety Comparison
| Variety | Container Size | Growth Time | Heat Level | Height | Sunlight |
|---|---|---|---|---|---|
| California Wonder | 5 gallon | 70-75 days | 0 SHU | 24-28″ | Full sun |
| Jalapeño | 3 gallon | 65-70 days | 2,500-8,000 SHU | 24-30″ | Full sun |
| Habanero | 5 gallon | 90-100 days | 100,000-350,000 SHU | 36-48″ | Full sun |
| Banana Pepper | 3 gallon | 60-75 days | 0-500 SHU | 18-24″ | Full sun |
Selecting the Ideal Container
It’s important to consider the size of the plant you need to grow and the space at hand when selecting the ideal container for pepper growing. The proper pot size can affect the yield and health of your plants throughout the long-time experiments of container gardening.
A pot that is at least 12 to 14 inches in size and 8 to 10 inches deep is a good choice for a lot of pepper varieties. A single pepper plant thrives in a 5–7-gallon container, such as a plastic seedling pot or grow pack. Smaller plants can be grown in pots as small as 2 gallons, or about 8 inches down, but keep in mind that this will limit the plant’s growth and productivity. A larger container allows the roots to spread out more, which results in a healthier plant and a higher harvest.
For larger pepper types, if you have enough space, think about moving to a 10-gallon or even a 20-gallon pot. Larger pots allow the plants to reach their full potential, but smaller pots can still be effective, especially for smaller or more modest pepper sets. Still, in my experience, plants grow better in larger pots, and you’ll likely get more peppers and greater harvests.
Think about how easy it will be to move your containers around as well. In reality, peppers thrive in movable containers that allow them to follow the sun or protect them from harsh weather conditions. Although materials such as coated soil pots, plastic, and clay are affordable, make sure the pot has waste outlets to prevent flooding.
If you’re using plastic pots that are dark or dull-shaded, keep in mind that they can absorb heat, which could affect the watering schedule. Although clay pots are beautiful to look at, be aware that they may become slightly wet, which means you will need to water them more frequently.
My research and experience with container gardening have shown me that the secret to a successful pepper garden is to invest in high-quality pots, especially ones with proper drainage. Your peppers will have the space and environment they require to thrive if you choose the correct size and type of container.
Starting from seed vs. buying a starter plant
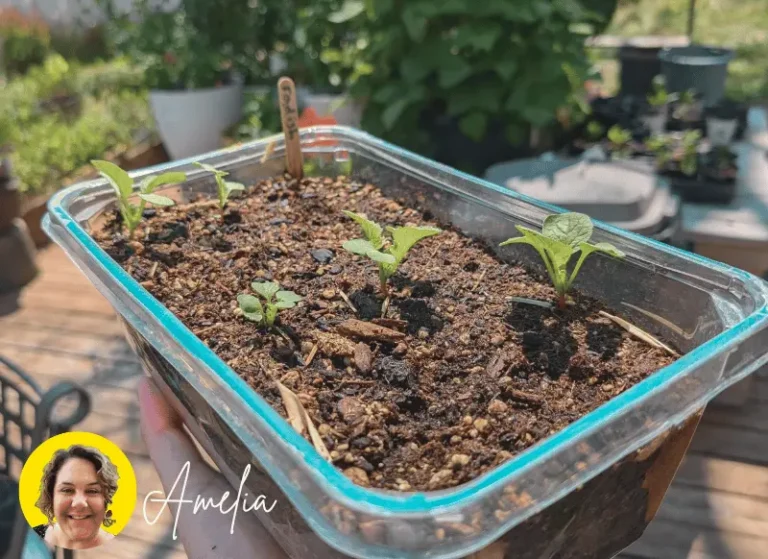
Your experience, patience, and time will decide if you’ll grow peppers from seed or buy starter plants. After growing peppers for a long time, I’ve found that starting from seed gives you a wider variety to choose from and is rewarding, but it requires work (8–10 weeks before the last frost) and careful consideration, like maintaining warm temperatures for growth.
A starter plant is a good option if you’re short on time or new to growing. They are easier to set out, ready to plant, and let you skip the exciting seedling time. The two techniques work flawlessly but start from seed if you’re aiming for the gold or a full-season insight. Use starter plants for a quick simple start.
Preparing the Perfect Soil Mix
During the gardening experience, I’ve learned that balance and quality are crucial when making the ideal mix of soil for pepper growing. For healthy growth, good potting soil should be light, well-draining, and nutrient-rich. The addition of organic matter, such as fertilizer, aged bark, or worm castings, has a huge impact since peppers flourish in slightly acidic soil.
I avoid regular garden soil because it doesn’t take proper airflow into the mix and compacts well in containers. To improve disposal and airflow, I mix a base fertilized soil with more nutrients such as sand, perlite, or vermiculite. An effective DIY mix combines equal parts older compost and topsoil plus a light ingredient such as perlite or coco coir to make up an efficient do-it-yourself mix.
Another option is to use 1/3 compost, 1/3 peat-based soil, and 1/3 coco coir mixed with kelp meal or chicken manure pellets. When using larger pots, I often put a layer of gravel at the bottom to ensure that too much water doesn’t cause root damage. This method has consistently produced healthy plants with robust growth and a plentiful harvest.
Setting Up and Planting Your Peppers
Pepper planting and positioning is a simple process, but careful attention ensures a thriving garden. Start putting in high-quality, well-draining potting mix in the container until there are about two inches of space left at the top.
Dig a small hole in the center deep enough to cover the root ball of the pepper plant, then carefully place the plant in the hole and fill it with soil. If you want it, gently push around the base without packing it too tightly. If you are planting seeds, plant them about 1/4 inch deep and keep the soil continually wet until they grow.
Place your containers in a sunny location like balconies, terraces, or stairs are great options—because peppers require 6 to 8 hours of full sunlight per day. When growing more than one plant, spacing is necessary. For better ventilation and to decrease the chance of disease, give each plant a minimum of 12 to 18 inches of space.
Because bigger sizes may need a lot of extra space so adjust them accordingly. If using grow bags or large containers, aim for one plant per container unless the pot is exceptionally large. Your peppers will grow and produce more if you place them properly and make sure they have space and light.
Watering and Feeding Peppers in Containers
Growing peppers in containers requires a balanced ratio of nutrients and water. These are the basic procedures; based on my experience, I hope you will adopt them.
Watering Frequency
Peppers thrive on soil that is consistently wet but not soggy. You would most likely need to water them daily in hotter climates, especially if they are in smaller containers. To truly test the soil’s moisture, use the “finger test” by pushing your finger 1-2 inches deep into the soil. Now is the time to water if it feels mostly dry. Watering early in the day is best since it prevents rapid absorption and ensures that the plants are not constantly soaking in moist soil, which can cause root damage.
Containers such as pots or grow bags may dry out more quickly in high intensity than raised beds or in-ground seedlings. A layer of mulch, like as wood chips, straw, or leaf mulch, applied on top of the soil prevents drying and keeps moisture.
Signs of Overwatering and Underwatering
Overwatering: Common symptoms include yellowing leaves, drooping stems with wet soil, and a soggy texture. Make sure there are enough drainage holes in the pots.
Underwatering: Cracking leaves, dry soil, and wilting are signs of not enough water. Deep watering should be done quickly to fix this.
Fertilizing Peppers
The soil mixture is the only source of nutrients when peppers are grown in containers, so fertilizing is important frequently. Peppers can be heavy feeders, especially while they are fruiting. Apply a suitable vegetable compost or one made for tomatoes and peppers regularly. For quick nutritional support, use smooth manures in your watering schedule.
Climate Considerations
Climate and container type affect watering requirements. I water every day in the summer in my hot, dry area. Verify the moisture level before watering in colder climates or during wet seasons.
Your peppers will thrive and yield heavily in containers if you continue to be aware of your plants’ needs and adjust your watering and maintenance routine accordingly. If you want to watch the proper procedure of watering then watch this:
Supporting Pepper Plants: Staking and Pruning
According to my experience, it’s helpful to stake pepper plants early on to ensure their durability and health as they grow. I use whatever is available to me, whether it’s bamboo stakes, wooden sticks, or even cracked metal stakes. Bamboo is affordable, but maybe you want a couple for every plant. Metal stakes are an excellent choice in terms of strength.
Leaves heavy with vegetation may need extra support as the season passes. To prevent damage, tie them gently to stakes with soft ties or twine.
Although pruning is optional, it can enhance airflow and highlight the plant’s organic potential. Trim any small, weak branches at the base, as well as any yellowing or diseased leaves. It’s a simple way to help your peppers grow and stay healthy.
Pepper Maturity Tracker
Track when your peppers will be ready for harvest and plan your garden effectively!
Growth Progress
Heat Level
Common Problems When Growing Peppers in Containers
Pest Management: Although container planting reduces many problems, you can still find pests like aphids, whiteflies, and even cutworms. Plants are weakened by aphids, pear-shaped sap suckers, and damaged leaves. The leaves can be easily removed with a good spray of water or by washing them with soapy water.
Little white-winged pests called whiteflies often collect beneath leaves, causing them to yellow or wither. Use yellow sticky snares to track pervasions and flush them off frequently. Neem oil might be a potent natural remedy for severe instances.
Anticipation of Disease: By maintaining constant soil moisture and using calcium-rich composts, bloom end rot caused by calcium imbalance or inconsistent watering can be avoided. Assure high drainage in pots to prevent infectious diseases or root rot. Avoid overfilling and overwatering, as they can increase the risk of disease.
Natural Remedies and Tips: Check plants regularly for early issues. To prevent pests, use insect repellent cleaner, neem oil, or companion planting with marigolds. Mulch can help maintain soil moisture levels and prevent outbreaks of disease when watering. Maintaining clean, spaced plants promotes wind flow and reduces the risk of disease.
Harvesting Your Peppers
Depending on whether you’re growing hot or sweet peppers, I’ve found that the timing of pepper harvests can have a major effect on flavor and heat.
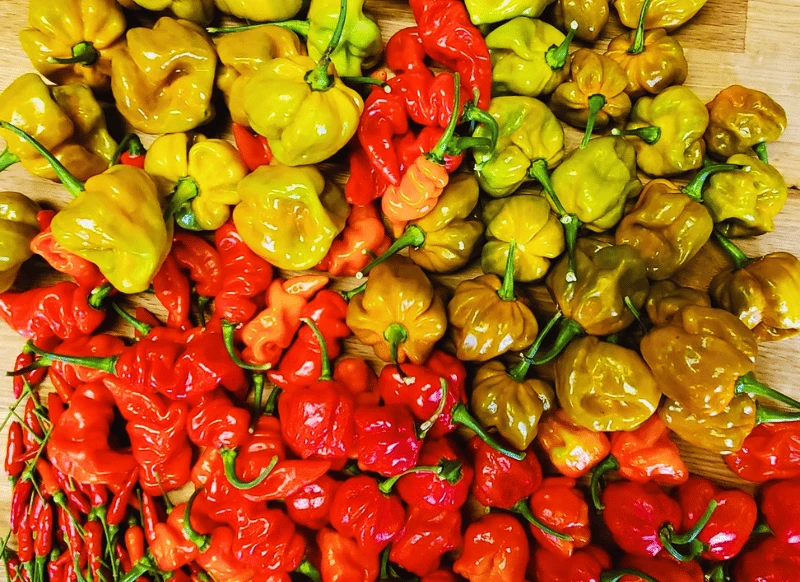
Sweet Peppers
When they grow to a size that can be used, they can be picked even if they are still green. However, you will notice a more lavish, richer taste if you wait till they reach bright red, yellow, or purple varieties. I’ve picked green peppers right from the vine for a quick get-together and delighted in their milder craving for pan-sears or mixed green salads.
Hot Peppers
It is recommended to leave these on the plant until it reaches its full height and its final tone, which is usually red, orange, or yellow. As they become mature, the heat increases. If you like to be less spicy, harvest green hot peppers early because they are less spicy. The peppers packed more flavor and heat when I left them completely ready, which made them perfect for drying or sauces.
To prevent harming the plant, peppers should always be cut using scissors or pruners. You’ll enjoy the ideal mixture of spice and flavor at the right moment!
Storing and Using Your Harvest
After harvesting, it’s important to handle your peppers properly to preserve them both now and in the future. I’ve found that washing peppers in a vinegar-water solution helps remove surface spores, but mold will undoubtedly appear eventually. I rely on a couple of tactics for long-term storage.
Freezing is my preferred method. Depending on what I’ll need in the next few days to a week, I vacuum-seal peppers in tiny bags. Accordingly, they can be stored in the refrigerator for up to two years. I just defrost them whenever I want them for stews, bean stews, or sautés. It’s a really useful option, especially for mass-producing varieties like Burmese bird peppers.
Another favorite is pickling. Pickled peppers can be stored for up to two years, provided the right pH and saltiness are maintained, but they will keep for around two months in the refrigerator.
These techniques—freezing, pickling, or fermenting—let me savor my crops for a long time after the growing season is gone.
Pepper Growing Checklist

About Author
Welcome! I’m Amelia, your dedicated gardener and passionate advocate for all things green.Explore my gardening journey through beautiful photos, insightful articles, and helpful tips. If you have any questions or just want to connect, feel free to drop me a note. Let’s grow together!

